Soil Fertilizer Timing Guide: When to Apply NPK, Top-Dress, and Fix Deficiencies
Gardening Guides >
Soil Fertilizer Timing Guide: When to Apply NPK, Top-Dress, and Fix Deficiencies
When to apply NPK, how often to top-dress compost, and how to read plant deficiency signs before your crops suffer
Key Takeaways
- Apply a balanced NPK fertilizer (10-10-10) 2 weeks before planting and again every 4–6 weeks during the active growing season — not at every watering.
- Top-dressing with 1 inch of compost every 6 weeks replenishes organic matter and adds slow-release nitrogen equivalent to roughly 0.5 lbs of 10-0-0 fertilizer per 10 sq ft.
- Nitrogen deficiency shows as yellowing that starts on the oldest (lowest) leaves and moves upward — phosphorus deficiency shows as purple-red discoloration on leaf undersides.
- Over-fertilizing with nitrogen during the fruiting stage delays harvest by 7–14 days and reduces fruit set by up to 30% on tomatoes and peppers.
- Soil pH between 6.0 and 7.0 is required for NPK uptake — even perfect fertilizer timing fails if pH is outside this range because nutrients become chemically locked in the soil.
Soil fertilizer timing is one of the most misunderstood parts of vegetable gardening. Most growers either apply fertilizer too early (before plants can use it), too late (after deficiency symptoms appear), or too often (causing salt buildup and nutrient toxicity). Getting the timing right is simpler than it sounds — it follows the plant’s growth stages, not a fixed calendar.
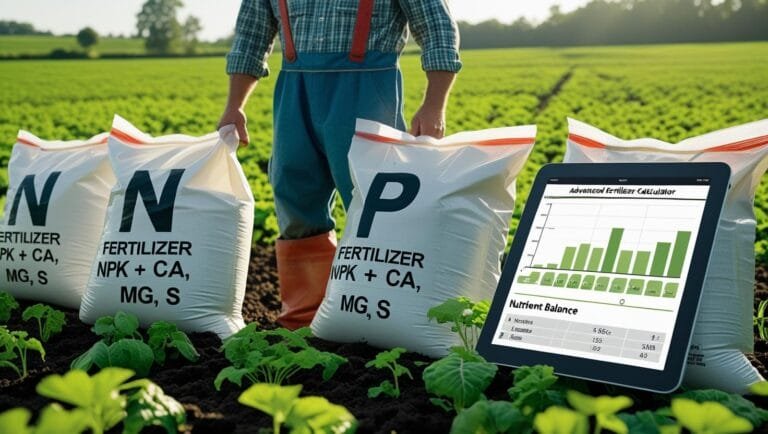
The three macronutrients — nitrogen (N), phosphorus (P), and potassium (K) — serve different functions at different points in a plant’s life. Nitrogen drives leaf and stem growth in the vegetative stage. Phosphorus supports root development and flower initiation. Potassium regulates water movement and strengthens cell walls during fruiting. Applying the right ratio at the wrong stage produces the wrong result, even with a high-quality fertilizer.
This guide gives you a stage-by-stage fertilizer timing schedule, a top-dressing frequency guide for compost and organic amendments, a complete plant deficiency visual reference, and the 7 most common fertilizer timing mistakes with exact fixes. Use the Soil NPK Calculator throughout to dial in precise application rates for your bed size.

Soil Fertilizer Timing: Quick Reference by Growth Stage
Hydroponic Nutrient Management: Precision Dosing by Growth Stage
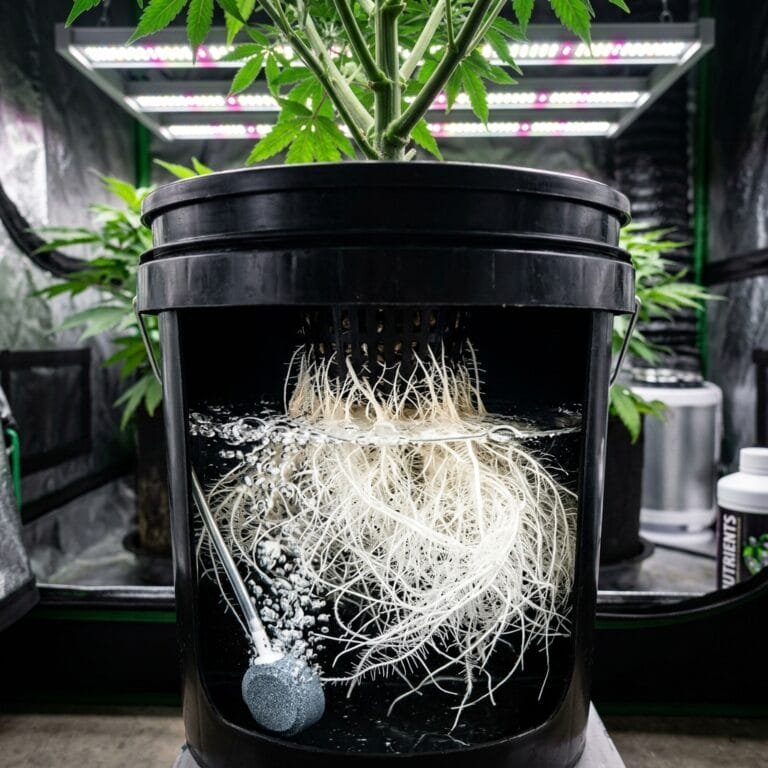
Effective hydroponic nutrient management dictates precise control over the Electrical Conductivity (EC) and pH of the circulating solution, adapting nutrient ratios to meet specific plant demands throughout its life cycle. Unlike soil, hydroponics allows for immediate and direct nutrient delivery, necessitating meticulous monitoring and adjustment.
Seedling Establishment & Early Vegetative Phase
Upon transplanting young seedlings into the hydroponic system, initiate nutrient delivery at a reduced strength to prevent nutrient burn. Target an initial EC range of 0.4-0.6 mS/cm (or 200-300 PPM on a 0.5 conversion factor) for the first 7-10 days. Maintain the nutrient solution pH rigorously between 5.5 and 5.9 to optimize nutrient availability for developing root systems. Utilize a mild, nitrogen-balanced formulation, often with a slightly higher phosphorus content (e.g., 10-10-10 or 15-10-15 NPK equivalent), to promote robust root establishment and initial foliar expansion. Solution temperature should be maintained between 18-22°C for optimal dissolved oxygen levels.
Mid-Vegetative Growth
As plants transition into vigorous vegetative growth, gradually increase the nutrient strength. Aim for an EC range of 1.2-1.8 mS/cm (600-900 PPM). The pH should be consistently held between 5.8 and 6.2. During this phase, the primary objective is rapid biomass accumulation, demanding a nitrogen-dominant nutrient solution. Common NPK ratios include 3-1-2 or 2-1-1 (e.g., 20-10-10 or 15-7-7). Monitor daily water uptake to gauge plant vigor and nutrient consumption. Replenish the reservoir with fresh solution regularly, ensuring a complete solution change every 7-10 days to prevent nutrient imbalances and salt accumulation.
Pre-Flowering & Transition Stage
The onset of the pre-flowering or transition stage, marked by the appearance of initial flower sites, necessitates a strategic shift in nutrient profile. Over a 3-5 day period, gradually reduce nitrogen input while concurrently elevating phosphorus (P) and potassium (K) concentrations. Target an EC of 1.8-2.2 mS/cm (900-1100 PPM) and maintain the pH between 5.9 and 6.3. An NPK ratio of approximately 1-2-2 or 1-3-3 (e.g., 5-10-10 or 8-16-16) supports the energy demands for floral initiation. This change signals to the plant to prioritize reproductive development over vegetative expansion.
Flowering & Fruiting Stage
During the peak flowering and fruiting phase, nutrient requirements shift dramatically towards high potassium and moderate phosphorus, with minimal nitrogen. Maintain an elevated EC, typically between 2.0-2.5 mS/cm (1000-1250 PPM) for heavy feeders, adjusting down for less demanding species. The pH range should be adjusted to 6.0-6.5 to optimize the uptake of phosphorus and potassium, which are less available at lower pH levels. Utilize a specialized flowering formula with an NPK ratio like 1-2-3 or 1-1.5-2 (e.g., 6-12-18 or 8-12-16). This nutrient regimen significantly enhances fruit size, sugar content, flavor, and overall yield. Continuous daily monitoring of EC and pH is paramount.
Ripening & Flushing Stage
Approximately 7-10 days prior to harvest, initiate the ripening and flushing protocol. Gradually reduce the nutrient solution EC by 50% over 2-3 days using a diluted version of the flowering formula. Subsequently, transition to plain, pH-adjusted water (pH 6.0-6.5) for the final 5-7 days. This process encourages the plant to consume stored nutrients within its tissues, leading to a cleaner, smoother flavor profile and improved product quality by minimizing residual mineral salts. Ensure continued circulation and aeration throughout the flush period.
Stage-by-Stage NPK Fertilizer Timing Schedule
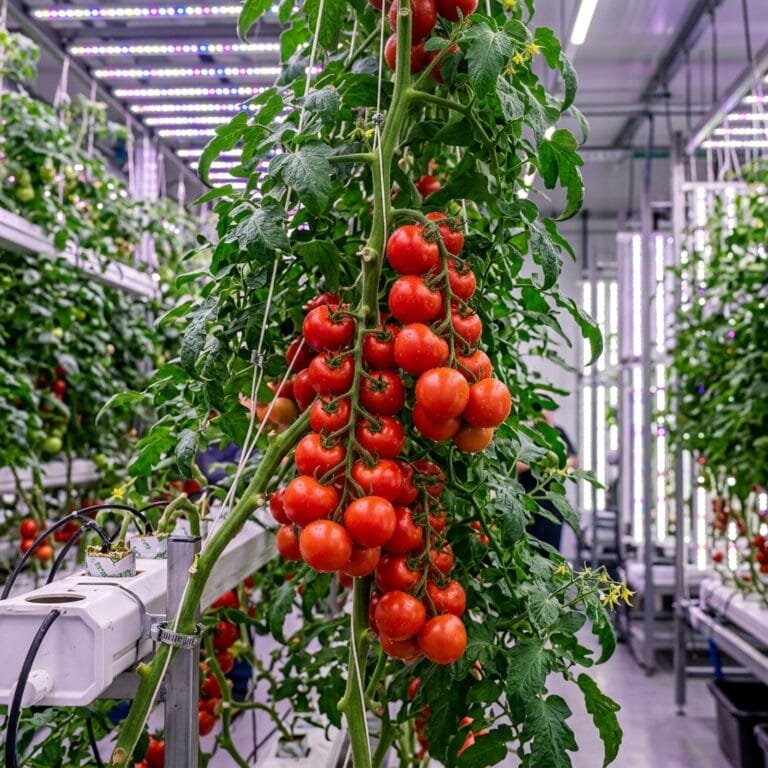
Follow this timeline for most warm-season vegetables — tomatoes, peppers, squash, beans, and cucumbers. Cool-season crops (lettuce, brassicas, spinach) follow the same structure but with shorter stages and lower overall nutrient demand. Use the Soil NPK Calculator to adjust application rates for your exact bed dimensions.
Pre-Plant Fertilization
Apply a balanced 10-10-10 granular fertilizer at 1–1.5 lbs per 100 sq ft and work it into the top 4–6 inches of soil. This feeds soil microbes first, which then convert nutrients into plant-available forms over 2–3 weeks. Never apply nitrogen-heavy fertilizer directly at planting — it burns new roots and delays establishment by 5–10 days.
Transplant Phosphorus Boost
Add 1 tablespoon of bone meal or a high-phosphorus transplant fertilizer (5-10-5) directly into each planting hole and mix with soil before setting the transplant. Phosphorus at this stage accelerates root hair development — root systems in phosphorus-supplemented transplant holes are measurably larger after 14 days compared to unfed controls. Do not apply liquid fertilizers for the first 7 days after transplanting — let roots settle first.
First Nitrogen Application
Once transplants show new leaf growth (usually 2–3 weeks after planting), apply a nitrogen-forward fertilizer at ½ strength — 0.5 lbs of 20-10-10 per 100 sq ft, or a liquid fish emulsion at 2 tbsp per gallon watered in. New growth that is dark green and rapid indicates nitrogen uptake is working. Pale green or yellow new leaves at this stage indicate the fertilizer hasn’t reached the root zone yet — check soil moisture and water the application in if the soil is dry.
Balanced NPK Maintenance Feeding
Apply a balanced 10-10-10 fertilizer every 4–6 weeks through the mid-vegetative phase. Liquid fertilizers (applied every 2 weeks at ½ strength) work faster but require more management; granular slow-release formulas (applied every 6 weeks) are more forgiving for busy growers. Always water in granular fertilizers with at least ½ inch of irrigation immediately after application to start the dissolution process and move nutrients toward the root zone.
Shift to Low-Nitrogen, High-P Formula
When first flower buds appear, stop all nitrogen-heavy fertilizers immediately. Switch to a 5-10-10 or 4-8-8 formula to support flower development without pushing excess vegetative growth. Excess nitrogen at flowering causes lush green plants with very few flowers — a condition called “going vegetative” that delays fruiting by 2–3 weeks. This is one of the most common fertilizer timing mistakes home growers make.
Potassium-Forward Fruiting Feed
Once fruits are actively sizing up, switch to a high-potassium formula (3-5-8 or 5-5-15) applied every 4 weeks. Potassium improves cell wall strength, which increases fruit firmness and shelf life by 3–5 days. It also activates the enzymes that convert starches to sugars, directly improving flavor. Track your application schedule with the Growth Rate Tracker to ensure feeding intervals stay consistent through the fruiting window.
Granular fertilizer sitting dry on the soil surface does nothing — it needs water to dissolve and move into the root zone. Always apply granulars the morning before a scheduled irrigation, or water in immediately after spreading with at least ½ inch of water. Fertilizer left on dry soil for more than 48 hours in hot weather can volatilize and lose 20–40% of its nitrogen content before it ever reaches the roots.
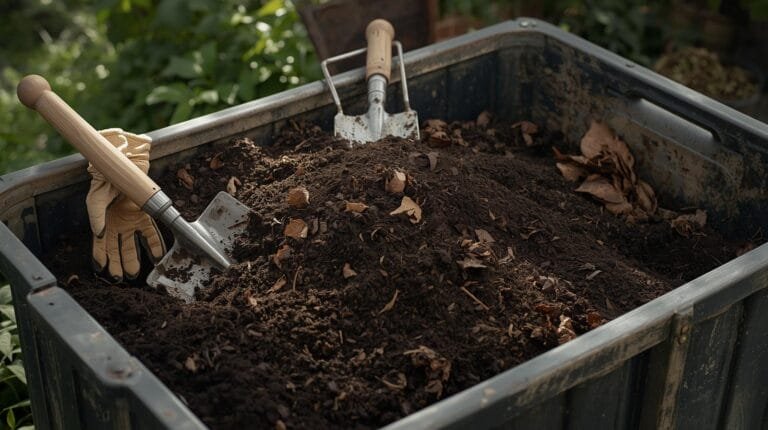
Top-Dressing Guide: Compost, Manure, and Organic Amendments
Top-dressing is the practice of spreading organic material on the soil surface around plants without digging it in. It feeds soil microbes, improves water retention, and adds slow-release nutrients — all without disturbing existing root systems. It’s one of the best mid-season soil improvement techniques available to vegetable gardeners.
Finished Compost — Every 6 Weeks
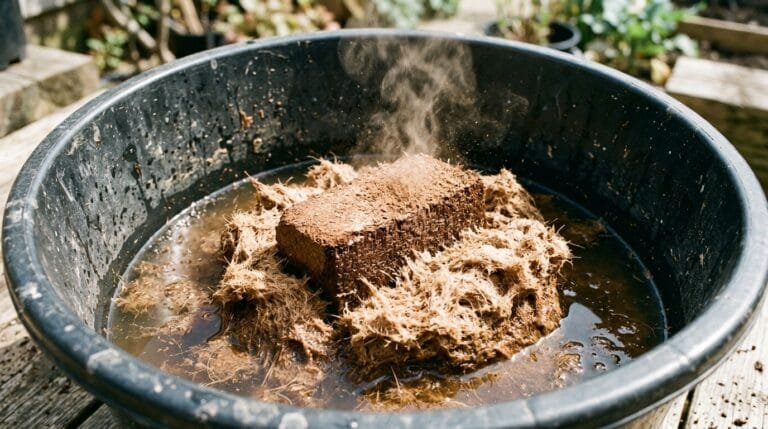
Apply 1 inch of finished compost as a top-dress every 6 weeks throughout the growing season. Finished compost has an NPK ratio of approximately 1-0.5-1, which is low enough to never burn roots but consistent enough to maintain organic matter levels. Use the Compost Calculator to calculate exact volume needed for your bed size before buying or harvesting from a home pile. One cubic foot of compost covers approximately 12 sq ft at 1-inch depth.
Aged Manure — Once Per Season
Apply aged chicken, cow, or horse manure once per season — either at bed preparation in spring or as an end-of-season soil restoration amendment. Fresh manure burns roots and introduces pathogens; aged manure (composted for 3–6 months) is safe. Chicken manure is the most nitrogen-dense at approximately 3-2-2 NPK; horse manure is lower at 0.7-0.3-0.6 but adds excellent organic matter. Never apply fresh manure within 90 days of harvest on root or leafy crops.
Worm Castings — Every 4 Weeks
Worm castings are the gentlest top-dress available — NPK of roughly 1-0-0 with a complex mix of beneficial microbes and plant growth hormones. Apply ½ inch every 4 weeks around the base of heavy feeders like tomatoes, squash, and brassicas. Castings never burn roots regardless of application rate, making them safe to use more frequently than any synthetic or manure-based amendment. They’re particularly effective at improving soil structure and water retention in sandy or compacted beds.
Mulch as a Passive Nutrient Cycle — Ongoing
A 2–3 inch mulch layer of straw, wood chips, or shredded leaves doesn’t deliver nutrients immediately, but it feeds soil microbes as it breaks down, reducing your fertilizer requirements by 20–30% over a full season. Wood chip mulch ties up nitrogen as it decomposes — compensate by applying an extra 0.25 lbs of nitrogen per 100 sq ft in beds that are heavily mulched. Use the Mulch Calculator to calculate the exact volume needed before buying.
Reading Plant Deficiency Signs: Visual Identification Guide
Deficiency symptoms appear in a predictable pattern based on whether the nutrient is mobile or immobile in plant tissue. Mobile nutrients (N, P, K, Mg) are pulled from old leaves to feed new growth — so deficiency symptoms show on lower, older leaves first. Immobile nutrients (Ca, Fe, Mn) can’t be moved once deposited — so symptoms appear on new growth and young leaves first.
Identifying which leaf position shows symptoms first tells you the nutrient category before you even examine the color. This narrows your diagnosis from 16 possible deficiencies to 2–3 candidates immediately.
Uniform yellowing, old leaves first
Entire lower leaves turn pale yellow-green and eventually light yellow. Moves progressively upward. Stems may turn red-purple on some varieties. Plants look generally pale and grow slowly. Fix: apply liquid nitrogen source (fish emulsion 2 tbsp/gal) for fast response within 5–7 days.
Purple-red discoloration, leaf undersides
Leaf undersides and stems turn purple or reddish-purple, starting on older lower leaves. Upper leaf surface may turn dark blue-green. Common in cold soil below 55°F which inhibits phosphorus uptake even when nutrients are present. Fix: warm the soil with black plastic mulch; apply liquid phosphorus feed.
Brown leaf edges, old leaves first
Leaf margins turn yellow then brown and crispy, starting at the tips of older lower leaves and progressing inward. Sometimes called “leaf scorch.” Fruit quality drops noticeably — tomatoes develop uneven ripening and poor flavor. Fix: apply potassium sulfate or wood ash (1 tbsp per plant) worked into the soil surface.
Tip burn, blossom end rot, new growth
New leaves curl, pucker, or develop brown crispy tips. In tomatoes and peppers, blossom end rot (dark sunken patch on fruit base) is the most visible symptom. Calcium deficiency is often caused by inconsistent watering rather than low calcium levels — irregular moisture prevents uptake even when calcium is present. Fix: mulch to maintain even soil moisture; add gypsum at 1 lb per 100 sq ft.
Interveinal chlorosis, old leaves first
Leaf veins stay green while tissue between veins turns yellow — called interveinal chlorosis. Appears on older lower leaves first and progresses upward in severe cases. Common in heavy-feeding crops like tomatoes and peppers after extended cropping. Fix: apply Epsom salt (magnesium sulfate) at 1 tbsp per gallon as a foliar spray every 2 weeks for fast uptake.
Interveinal chlorosis, NEW leaves first
Identical appearance to magnesium deficiency — yellow between green veins — but appears on the youngest new leaves at the top of the plant, not the old lower leaves. Almost always caused by pH above 7.0 locking out iron rather than true iron deficiency. Fix: lower soil pH to 6.0–6.5 with sulfur amendments; iron chelate foliar spray provides temporary relief within 48 hours.
Yellowing lower leaves is the most common symptom growers misdiagnose as nitrogen deficiency when it’s actually overwatering. The test: check 2 inches below the soil surface. If the soil is consistently wet and the lower leaves are yellow, the problem is drainage or watering frequency — not fertilizer. Adding nitrogen to waterlogged soil makes root rot worse. Fix the drainage first, then reassess nutrient needs after 7–10 days of improved conditions.
Granular vs Liquid vs Slow-Release: Which to Use and When
Granular vs Liquid vs Slow-Release: Which to Use and When
While various nutrient formats exist for traditional gardening, the precision demands of hydroponics necessitate a highly specific approach to nutrient delivery. For inert media and sterile recirculating systems, liquid nutrient formulations are the standard. Granular, slow-release, and organic/compost-based amendments are generally unsuitable due to their slow and inconsistent release kinetics, inability to dissolve completely into a homogenous solution, and potential to introduce undesirable microbial loads or clog irrigation lines within controlled hydroponic environments.
Liquid hydroponic nutrient concentrates offer immediate nutrient availability and unparalleled control over the nutrient solution’s Electrical Conductivity (EC) and pH. This allows for precise adjustments tailored to specific plant growth stages and species requirements, maximizing absorption efficiency and preventing nutrient lock-out or toxicity.
- Liquid Hydroponic Formulations: These are typically multi-part systems (e.g., 2-part “Grow” and “Bloom,” or 3-part “Micro,” “Grow,” “Bloom”) designed to be mixed with water to create a complete nutrient profile.
- Application: Nutrients are dosed directly into the reservoir. Precise measurement using calibrated EC and pH meters is paramount to maintain solution integrity. Always add each nutrient component individually to the reservoir and mix thoroughly before adding the next, preventing nutrient precipitation.
- EC Management: Maintain specific EC ranges based on the growth stage and plant species. For most vegetative growth phases, target an EC between 1.2 and 1.8 mS/cm (or 600-900 ppm on a 0.5 conversion scale). During the flowering or fruiting phase, increase the EC to 1.8-2.5 mS/cm (900-1250 ppm) for heavy-feeding common crops. Consistent daily monitoring is non-negotiable to prevent root burn from excessive salinity or under-feeding.
- pH Regulation: The pH of the nutrient solution directly impacts nutrient uptake efficiency. Maintain the reservoir pH within a narrow range of 5.8-6.2 for optimal availability of both macro and micronutrients for most plant species. Deviations outside 5.5-6.5 can induce nutrient deficiencies even when all elements are physically present in the solution. Use pH Up (potassium carbonate/hydroxide) or pH Down (phosphoric acid/nitric acid) solutions sparingly to make daily corrections.
- Frequency: The entire nutrient solution in the reservoir should be replaced entirely every 7-10 days to prevent nutrient imbalance, pathogen buildup, and problematic salt accumulation. Between full changes, top-offs should use pH-adjusted water, or a diluted nutrient solution if the EC has dropped significantly, to maintain stable concentrations.
- Application: Apply finely atomized sprays to both the adaxial (top) and abaxial (underside) surfaces of leaves, during low light conditions (dawn or dusk) or just after lights out to prevent leaf scorching and maximize stomatal absorption. Ensure thorough, even coverage.
- Concentration: Use significantly diluted solutions compared to root-zone feeding. Target an EC of 0.5-1.0 mS/cm for most foliar applications to avoid phytotoxicity. Never use full-strength nutrient solutions for foliar application.
- Best Use: A fast-acting temporary remedy for specific, visually identified deficiencies, not a substitute for proper root-zone nutrition or a consistently balanced reservoir.
Step-by-Step: Building Your Full Season Fertilizer Schedule
-
Test Soil pH Before Any Fertilizer Application
pH outside 6.0–7.0 renders fertilizer largely useless — nutrients bond to soil particles and become unavailable to roots. Test with a soil pH meter or test kit. Adjust with garden lime (raises pH) or sulfur (lowers pH) 2–3 weeks before applying fertilizer. Use the pH Calculator to determine how much amendment is needed. -
Calculate Your Bed Area and Amendment Volumes
Fertilizer rates are given per 100 sq ft — you need your exact bed area to avoid over- or under-applying. Use the Soil NPK Calculator to input your bed dimensions and get exact grams or pounds per application for any NPK formula. Save this calculation and revisit it at each feeding interval. -
Apply Pre-Plant Fertilizer 2–3 Weeks Before Planting
Spread 1–1.5 lbs of 10-10-10 per 100 sq ft and fork it into the top 4–6 inches. Water thoroughly. The 2–3 week gap allows soil microbes to begin breaking down granules — nutrients are in plant-available form by planting day. Skipping this step and fertilizing at planting is the most common timing mistake. -
Add Transplant Phosphorus at Planting
Place bone meal or 5-10-5 fertilizer at 1 tbsp per hole, mix with soil at the base, then transplant. This targeted application gets phosphorus exactly where new roots will develop in the first 7–14 days. Water in immediately after planting. -
Start Nitrogen Feeding at First New Growth
When transplants produce their first new leaves after planting (typically 2–3 weeks), begin nitrogen feeding at ½ strength. Liquid fish emulsion or diluted balanced liquid fertilizer applied to the root zone works fastest. Check leaf color after 7 days — new growth should be noticeably darker green within a week of the first nitrogen application. -
Top-Dress Compost Every 6 Weeks Through the Season
Apply 1 inch of finished compost around the base of all plants, keeping it 2 inches away from stems to prevent crown rot. Water in lightly. This step runs parallel to all other fertilizer applications — compost top-dressing is background nutrition, not a replacement for targeted NPK feeding at each growth stage. -
Switch Formulas at First Flower Bud Formation
This is the single most important timing shift in the entire schedule. Drop nitrogen to the lowest level in your current formula and increase phosphorus and potassium. Missing this transition by even 1–2 weeks causes measurable reductions in fruit set. Set a reminder when you transplant, based on your crop’s expected days-to-flower. -
Monitor Weekly for Deficiency Signs
Spend 5 minutes each week checking lower leaf color, new leaf appearance, and stem color. Cross-reference against the deficiency guide in this article. Early detection — at the first sign of discoloration — means a liquid corrective feed resolves the issue in 5–7 days. Waiting until symptoms are severe means 2–4 weeks of reduced growth that can’t be recovered. Use the Growth Rate Tracker to log weekly observations alongside height measurements.
Before applying any fertilizer, squeeze a handful of soil. If water drips out, the soil is too wet — fertilizer applied to waterlogged soil washes straight through the root zone and is wasted. If the soil crumbles and won’t hold its shape, it’s too dry — nutrients won’t dissolve or move to roots. The right consistency holds its shape for 2–3 seconds then slowly crumbles. That’s when soil is at optimal moisture for fertilizer absorption.
Common Fertilizer Timing Mistakes and How to Fix Them
| Mistake | What Happens | Fix |
|---|---|---|
| Applying nitrogen at flowering | Plants produce lush foliage but few flowers; fruiting delayed 7–14 days | Stop all N-heavy fertilizers immediately; switch to high P-K formula; flush with plain water once to dilute excess N |
| Fertilizing dry soil | Granules sit on surface, don’t dissolve; roots never receive nutrients; possible salt burn if rain concentrates dry granules | Always water soil to optimal moisture before and after granular fertilizer application; never apply to bone-dry beds |
| Skipping pH test before feeding | Fertilizer applied at wrong pH is chemically unavailable; plants show deficiency despite correct NPK applications | Test and correct pH first; retest 2 weeks after amendment before resuming fertilizer schedule |
| Over-fertilizing with synthetic N | Leaf tips burn; roots damaged by salt buildup; soil microbe populations decline; excess nitrate leaches to groundwater | Flush bed with 2–3 inches of plain water over 3 days to leach excess salts; apply compost to restore microbial activity |
| Using fresh manure near harvest | E. coli and pathogen contamination risk on edible crops; root burn from ammonia in fresh manure | Only use aged/composted manure; apply at least 90 days before harvest on root and leafy crops; 120 days if manure contacts soil surface |
| No fertilizer after transplanting (waiting too long) | Plants exhaust starter nutrients in transplant mix within 3–4 weeks; growth stalls; deficiency symptoms appear mid-season | Begin liquid nitrogen feeding at 2–3 weeks after transplanting — don’t wait for visible yellowing to start feeding |
| Applying foliar spray in direct afternoon sun | Droplets act as magnifying lenses on leaves causing sunscald; evaporation rate too high for nutrients to absorb | Always apply foliar sprays in the early morning (before 9am) or evening after direct sun passes; never mid-day in summer |
End-of-Season Soil Restoration
End-of-Season Soil Restoration
The conclusion of a hydroponic cultivation cycle mandates a comprehensive system reset to mitigate pathogen transmission, prevent nutrient accumulation imbalances, and optimize conditions for subsequent crop success. Neglecting thorough end-of-season protocols can lead to reduced nutrient use efficiency, increased susceptibility to root diseases like Pythium and Phytophthora, and diminished yield potential in subsequent cycles, requiring disproportionate resource allocation to maintain suboptimal performance.
Post-harvest, immediate action involves the removal of all spent plant material and a detailed inspection of the entire system for biofilm or calcification. For inert substrates such as hydroton or perlite, sterilization is paramount. Hydroton can be rinsed thoroughly and then soaked in a 5% hydrogen peroxide solution (H2O2) for 24 hours, followed by a flush with pure reverse osmosis (RO) water until the effluent EC is below 0.1 mS/cm. Rockwool, if not replaced, benefits from a thorough leaching with a low-EC, pH 5.5 solution to remove residual salts. Coco coir substrates benefit from a 24-hour flush with a calcium nitrate solution (EC 0.8-1.0 mS/cm) to reset the cation exchange complex, followed by extensive rinsing with pH 6.0 RO water until effluent EC stabilizes below 0.2 mS/cm.
- System Disinfection: Drain all existing nutrient solution. Flush the entire system, encompassing reservoirs, lines, pumps, and drippers, with a 0.5% hypochlorite bleach solution (e.g., 50ml household bleach per 10 liters of water) or a food-grade hydrogen peroxide solution (35% H2O2 diluted to 2-3ml per liter) for a contact time of 4-6 hours. Ensure all components are thoroughly saturated.
- Rinsing Protocol: Following disinfection, execute a rigorous two-stage flush of the system using pure RO water until the effluent EC is consistently below 0.1 mS/cm and the pH stabilizes near 6.5-7.0, confirming the complete elimination of cleaning agents.
- Equipment Calibration: Calibrate your pH meter using certified buffer solutions (e.g., pH 4.01 and pH 7.00) and your EC meter with a 1.413 mS/cm standard solution. This precise calibration ensures accurate nutrient solution management for the imminent cultivation cycle.
Before introducing new transplants, refill the system with a freshly prepared nutrient solution tailored to the crop’s specific vegetative stage. Target an initial EC between 1.2-1.8 mS/cm and maintain a stable pH within the optimal range of 5.8-6.2 for most common hydroponic vegetables. This proactive and precise approach minimizes transplant shock and maximizes nutrient bioavailability from the onset of the new growth cycle, directly impacting early vigor and subsequent yield metrics.
Advanced Tips & Daily Maintenance
- Daily Check: Verify your reservoir water level and temperature are stable.
- Weekly Maintenance: Calibrate your pH pen and verify your EC readings are accurate.
- System Flush: Remember to completely flush and replace your nutrient solution every 10-14 days to prevent salt buildup.
Troubleshooting Common Issues
- Yellowing or Browning Leaf Tips Post-Application: This often signals over-fertilization. Immediately flush the soil with plain, pH-balanced water until water drains freely from the bottom to wash out excess salts. Review your fertilizer application rates.
- Persistent Pale Green Leaves or Stunted Growth: If plants remain pale or small despite regular feeding, it might indicate under-fertilization or a nutrient lockout caused by incorrect soil pH. Test your soil pH and adjust accordingly; consider a comprehensive soil test.
- Specific Deficiency Symptoms Don’t Improve: If a targeted nutrient application (e.g., iron for chlorosis) doesn’t resolve the issue, factors like root damage, compaction, poor drainage, or continued pH imbalance might be preventing nutrient uptake. Improve soil structure and aeration.
- Algae Growth on Soil Surface: This can be a sign of overwatering combined with excessive nutrient runoff, which can lead to anaerobic conditions and nutrient loss. Reduce watering frequency, ensure proper drainage, and lightly scratch the soil surface to break up algae.
Frequently Asked Questions
Troubleshooting Common Issues
- Yellowing Lower Leaves: Often indicates a nitrogen deficiency. Ensure your feeding schedule is consistent with the plant’s growth stage and consider a nitrogen-rich amendment if needed.
- Stunted Growth & Dark Green/Purplish Leaves: Points to a potential phosphorus deficiency. Verify your soil pH is within the optimal range (6.0-7.0 for most plants) to ensure proper nutrient uptake.
- Brown or Burnt Leaf Tips/Edges: A classic sign of over-fertilization or nutrient burn. Immediately flush your soil with plain water and reduce your fertilizer concentration for subsequent feedings.
- Pale New Growth & Interveinal Chlorosis: Suggests an iron or other micronutrient deficiency. This can often be due to high soil pH. Adjust pH down with organic matter like peat moss or use a chelated micronutrient supplement.