Hydroponic pH Adjustment Guide: How Much pH Up and pH Down to Add

Home
»
Gardening Guides
»
Hydroponic pH Adjustment Guide
Quick Answer: To adjust hydroponic pH, you must measure the baseline pH, then add exactly 1 milliliter of pH Up or pH Down per gallon of water to swing the pH by roughly 0.5 points. Never add adjustment fluids directly to the roots. Always dilute the acid or base in a cup of water first, pour it into the main reservoir, stir vigorously for 15 minutes, and re-measure. You can calculate the exact milliliter dosage required for your tank using our free Hydroponic pH Calculator.

What Most pH Guides Miss (And What You Will Learn Here)

  • The Rebound Effect: Why adjusting pH before adding your fertilizers will force you to do it twice.
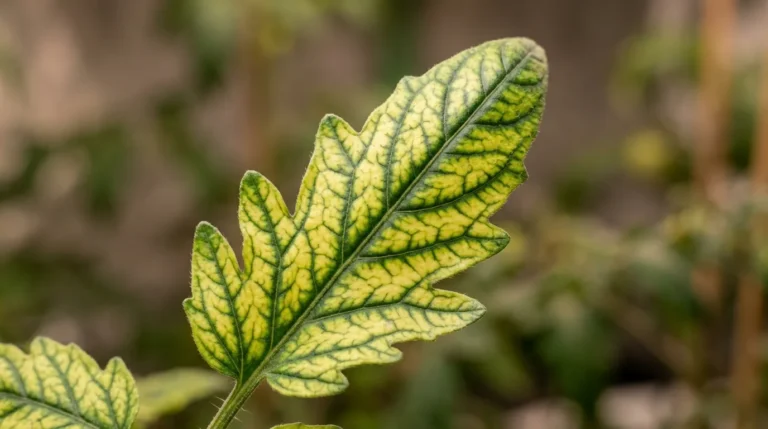
  • Micro-Nutrient Lockout: How a pH of 6.8 literally binds iron molecules so roots cannot absorb them, turning top leaves bright yellow.
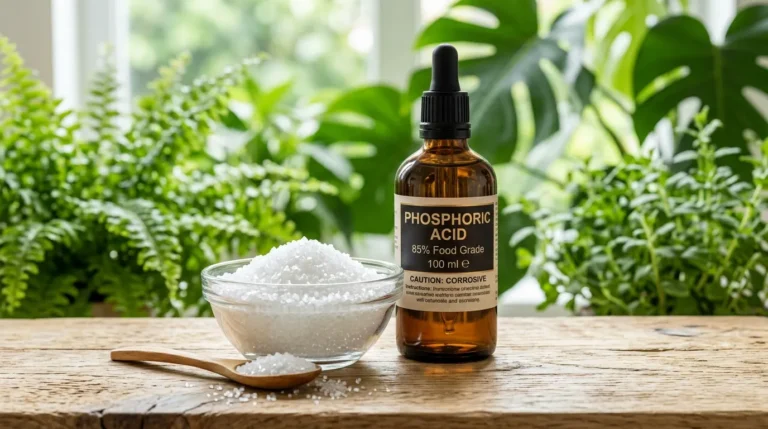
  • The Dilution Rule: Why pouring pure Phosphoric Acid directly into your tank will instantly burn root hairs.
  • Logarithmic Math: Why lowering pH from 7.0 to 6.0 requires vastly more acid than lowering it from 6.0 to 5.0.
  • Drift Tolerance: Why letting your pH slowly swing between 5.5 and 6.2 is actually better than keeping it at a robotic 5.8 forever.
Hydroponic pH Adjustment Guide 202607101623 - Hydroponic pH Adjustment Guide: How Much pH Up and pH Down to Add

Insights Most Growers Overlook

  • You must never mix pH Up (Potassium Hydroxide) and pH Down (Phosphoric Acid) in the same cup. Doing so creates a violent chemical neutralization reaction.
  • Adding fertilizers (Part A and Part B) will naturally lower the pH of your tap water significantly. Never adjust your pH until all nutrients are fully dissolved.
  • Reverse Osmosis (RO) water has zero buffers, meaning a single drop of acid will send the pH plummeting to 3.0. You must add Cal-Mag to RO water before adjusting pH.

Why pH Adjustment is Critical in Hydroponics

In soil gardening, the dirt acts as a massive chemical buffer, neutralizing extreme acids and bases while soil microbes break down nutrients slowly. In hydroponics, there is no buffer. The water is the only medium between the fertilizer salts and the delicate root hairs.

pH stands for “Potential of Hydrogen,” measuring how acidic or alkaline a liquid is on a scale from 0 to 14. If the water’s pH falls out of the target “sweet spot” (usually 5.5 to 6.3 for hydroponics), a chemical reaction occurs. The nutrient salts precipitate—meaning they physically bind together into solid particles that are too large to pass through the root cell walls. The plant can literally starve to death while floating in water packed full of fertilizer. This is known as “Nutrient Lockout.”

Understanding the Logarithmic pH Scale

The biggest mistake beginners make is treating the pH scale like a normal ruler. The pH scale is logarithmic, meaning every 1-point change represents a 10-fold increase or decrease in acidity. A pH of 5.0 is 10 times more acidic than 6.0, and 100 times more acidic than 7.0.

Because of this logarithmic curve, lowering your pH from 7.5 down to 6.5 takes a considerable amount of pH Down. But lowering it from 5.5 to 4.5 takes only a microscopic drop. This is why it is incredibly easy to overshoot your target and cause a wild, bouncing pH swing that stresses the crop.

Hydroponic pH Adjustment Guide 202607101623 - Hydroponic pH Adjustment Guide: How Much pH Up and pH Down to Add
💡 Pro Tip / What Most Guides Miss: Error generating content.

How Much pH Up and pH Down to Add

A reliable baseline rule for commercial hydroponic fluids (like General Hydroponics) is: Add 1 milliliter (mL) of pH Down per gallon of reservoir water to lower the pH by 0.5 points. However, tap water buffering varies wildly by city. Always start by adding exactly half of your calculated dose, wait 15 minutes, and re-test.

Common Mistakes to Avoid

  • Mistake: Pouring concentrated acid directly over the root ball.
    Fix: This will chemically scorch the roots. Pour adjustments into the highest-flow area of the reservoir, far from the root mass.
  • Mistake: Testing the water 3 seconds after adding the acid.
    Fix: It takes time for the acid to neutralize the water’s alkalinity buffers. You must wait 15 minutes before taking an accurate reading.
  • Mistake: Playing pH ping-pong.
    Fix: If you overshoot and the pH drops to 4.5, do not immediately dump pH Up into the tank to fight it. Adding acid, then base, then acid creates a toxic buildup of sodium and potassium salts. Drain 50% of the tank and replace with fresh water instead.

The 5-Step Safe Adjustment Process

Hydroponic pH Adjustment Guide 202607101623 - Hydroponic pH Adjustment Guide: How Much pH Up and pH Down to Add

To protect your plants and avoid salt buildup, follow this strict protocol every time you adjust your reservoir:

  • Step 1: Mix all base nutrients, Cal-Mag, and silica first. Allow the tank to circulate for 10 minutes.
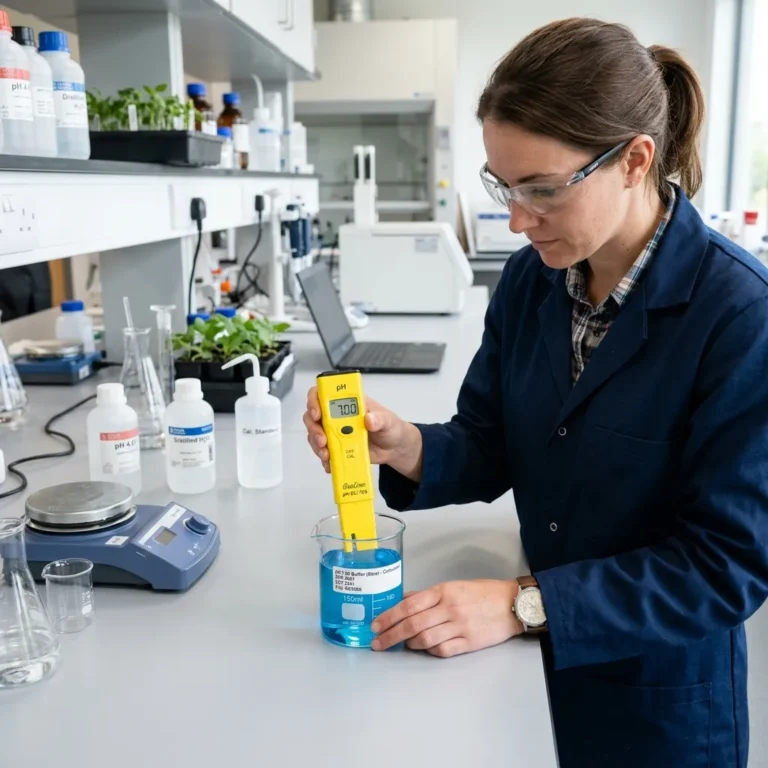
  • Step 2: Use a calibrated digital pH pen to take a baseline reading.
  • Step 3: Calculate your dosage. Using a syringe or pipette, pull the required amount of pH Down.
  • Step 4: Squirt the acid into a small cup of plain water to dilute it, then pour that cup slowly into a high-flow area of your reservoir.
  • Step 5: Wait 15 minutes for the chemical reaction to stabilize, then test again. Repeat if necessary.

Managing pH Drift: When Not to Adjust

Many beginners panic when they set their tank to exactly 5.8 on Monday, only to check on Tuesday and see it has drifted to 6.1. Do not adjust it! Plants absorb different elements at different pH ranges. For example, Manganese is absorbed best at 5.5, but Calcium is absorbed best at 6.2.

By allowing the pH to naturally “drift” up from 5.5 to 6.3 over the course of the week, the plant gets access to the full spectrum of micronutrients. You should only add pH Down when the tank drifts above 6.3 or 6.4.

Diagnosing pH Lockout Symptoms

Lockout Symptoms Based on pH Extremes
Current pH Element Locked Out Visual Symptom on Plant
Above 6.5 (Alkaline) Iron (Fe) New top leaves turn bright yellow while veins remain sharply green.
Above 6.5 (Alkaline) Manganese (Mn) Brown necrotic spots appear on middle leaves.
Below 5.4 (Acidic) Calcium (Ca) New growth is crinkled or deformed; blossom end rot on tomatoes.
Below 5.4 (Acidic) Magnesium (Mg) Older lower leaves turn pale yellow between the veins.
Rapid Fluctuations Total Lockout Plant growth stops entirely, roots may turn brown and slimy.

Calculate Your Exact pH Up/Down Dosage

The pH scale is logarithmic, meaning trial and error usually results in violent pH swings that stress your plants. Stop playing the guessing game and calculate the exact number of milliliters your specific reservoir needs. Use our free pH Calculator to instantly find your required dose of phosphoric acid or potassium hydroxide.

Save this guide for later!

Never crash your hydroponic reservoir again. Pin this pH dosage cheat sheet to your indoor garden board.

Save to Pinterest

Pin for Hydroponic pH Adjustment Guide: How Much pH Up and pH Down to Add - pH up down bottles testing 202607101623

Frequently Asked Questions

While you can use white vinegar or lemon juice to lower pH in an absolute emergency, they are highly unstable organic compounds. They will break down rapidly, causing the pH to spike back up within 24 hours, and they introduce sugars that feed harmful root-rot bacteria. Stick to Phosphoric Acid.

If your pH drops daily, it usually means your plants are consuming more water than nutrients, leaving a higher concentration of acidic fertilizer salts behind. It can also be an early indicator of root rot (Pythium) bacteria releasing acidic waste into the water.

A slowly rising pH is actually normal and desirable. As healthy plants consume acidic fertilizers (like nitrogen) out of the water, the water becomes more alkaline. Extreme air stones (excessive oxygenation) can also drive off dissolved CO2, raising the pH.

ALWAYS adjust pH AFTER adding nutrients. Commercial fertilizers are highly acidic and will dramatically alter the pH of plain tap water. Adjusting beforehand is a complete waste of time and chemicals.

You must use a known 7.0 buffer solution and a 4.0 buffer solution. Never use tap water. Dip the probe into the 7.0 solution and press the calibrate button. Rinse with distilled water, then repeat with the 4.0 solution. Recalibrate monthly.

While paper test strips or liquid indicator drops work, they rely on color matching, making it very difficult to tell the difference between 5.5 and 6.0. In hydroponics, that 0.5 difference is massive. A digital pen is highly recommended.

Yes. Commercial pH Down is pure concentrated Phosphoric Acid, and pH Up is Potassium Hydroxide. They can cause severe chemical burns to skin and eyes. Always use pipettes or syringes to handle them, and never mix them together.

👨‍🌾

About the Author: Wara Danish

Wara Danish is a horticultural researcher with 8+ years of hands-on experience in soil ecology and organic amendment strategies. She designs tools and publishes guides at currentgardening.com to help growers optimize their harvests naturally.
Similar Posts

  • Hydroponic Tomato Nutrient Schedule: EC & PPM Curve Guide

    Home > Hydroponic Nutrients > Hydroponic Tomato Nutrient Schedule: EC & PPM Curve Guide Last Updated: July 11, 2026 | Fact Checked By: Current Gardening Editorial Team Quick Answer: Tomato EC/PPM Curve Tomatoes require an escalating nutrient curve. Seedling Stage (Weeks 1-3): Target an EC of 1.0 (500 PPM) with high Nitrogen. Vegetative Stage (Weeks 4-6): Push the EC to 2.0 (1000 PPM). Flowering & Fruiting Stage (Weeks 7+): Spike the EC up to 2.5 – 3.5 (1250 – 1750 PPM) while heavily dropping Nitrogen and maxing out Potassium and Calcium. Always lock your pH strictly between 5.5 and 6.0 to prevent iron lockout. Peak Fruiting EC 2.5 – 3.5…

  • Hydroponic Nutrient Lockout: Spot Leaf Symptoms & Fix

    Home » Hydroponics » Hydroponic Nutrient Lockout: Spot Leaf Symptoms & Fix Last Updated: August 08, 2026 | Reviewed for accuracy, clarity, and safety Quick Answer: Imagine sitting at a buffet loaded with your favorite food, but your mouth is taped shut. That is exactly what your hydroponic plants experience during nutrient lockout. You can pour an entire bottle of expensive Cal-Mag into your reservoir, but if the pH is hovering at 7.2, the calcium molecules physically cannot pass through the root membrane. ⏱️ Time: 1 Hour 💪 Difficulty: Intermediate 💰 Est. Cost: $0 – $50 📋 Table of Contents The Biology of Nutrient Lockout How to Spot Leaf Symptoms…

  • How to Grow Hydroponic Peppers: Complete Guide for Beginners

    How to Grow Hydroponic Peppers: Complete Guide for Beginners Key Takeaways ⏱️ Harvest Time: 80–120 days from transplant (12–18 weeks depending on variety). 🧪 Ideal pH: 5.8–6.2 — use our pH Calculator to stay on target. ⚡ Ideal EC: 2.0–3.0 mS/cm — rises during fruiting stage. 💧 Best System: Drip System or Deep Water Culture (DWC). 💡 Pro Tip: Peppers are self-pollinating but need a gentle shake or a small fan to move pollen between flower parts when growing indoors. Learning how to grow hydroponic peppers is a game-changer for any indoor gardener. A peppers hydroponic setup lets you grow peppers hydroponically naturally — using organic nutrients and beneficial microbes…

  • Rockwool vs Coco Coir vs Clay Pebbles: The Ultimate Hydroponic Media Guide

    Home » Hydroponics » Rockwool vs Coco Coir vs Clay Pebbles: The Ultimate Hydroponic Media Guide Last Updated: August 08, 2026 | Reviewed for accuracy, clarity, and safety Quick Answer: Rockwool features extremely high total porosity (~95%), allowing it to hold tremendous water volumes while maintaining sufficient interstitial air spaces. Coco coir offers a balanced 70% WHC with 20% AFP, making it highly forgiving for hand-watered containers. LECA clay pebbles have low water retention but offer unrivaled air porosity (>40%), protecting roots from drowning even under continuous liquid flow. ⏱️ Time: 30 Minutes 💪 Difficulty: Beginner 💰 Est. Cost: $50 – $150 📋 Table of Contents Physical & Chemical Properties…

  • Step-by-Step Guide: How to Calibrate pH Pen Tools

    Home » Hydroponics » Step-by-Step Guide: How to Calibrate pH Pen Tools Last Updated: August 08, 2026 | Reviewed for accuracy, clarity, and safety Quick Answer: Your hydroponic pH pen is the steering wheel of your entire indoor garden. If your pH pen is giving you false readings, you are driving completely blind. A pen that is uncalibrated by just 0.5 points will lead you to dump excessive amounts of phosphoric acid into your reservoir, causing instant and catastrophic nutrient lockout. ⏱️ Time: 30 Minutes 💪 Difficulty: Beginner 💰 Est. Cost: $50 – $150 📋 Table of Contents Why Do pH Pens Fall Out of Calibration? Materials Needed for Proper…

  • Lower Hydroponic pH Safely: Organic pH Down Alternatives

    Home > Hydroponic Systems > Lower Hydroponic pH Safely: Organic pH Down Alternatives Last Updated: July 2026  |  Reviewed for organic acid dissociation constants (pKa), microbial oxidation kinetics, and humate chelation Quick Answer: To lower hydroponic reservoir pH organically and safely, use food-grade citric acid powder (0.1 grams per gallon drops pH ~0.5 units) or **humic/fulvic acid chelators**, which buffer pH while stimulating beneficial rhizosphere activity. While organic acids (citric, acetic, ascorbic) work rapidly, they are consumed by heterotrophic bacteria within 48 to 72 hours. For permanent stability in long-term reservoirs, combine organic buffers with proper air stone aeration or mineral phosphoric acid. Calculate total mineral strength with our EC…

Leave a Reply

Your email address will not be published. Required fields are marked *