How to Grow Hydroponic Parsley: Complete Nutrient, Lighting & Harvesting Guide
Author: Wara Danish, MSc Plant Biology & Agronomy |
Fact-Checked: Horticultural Precision & System Engineering Verified
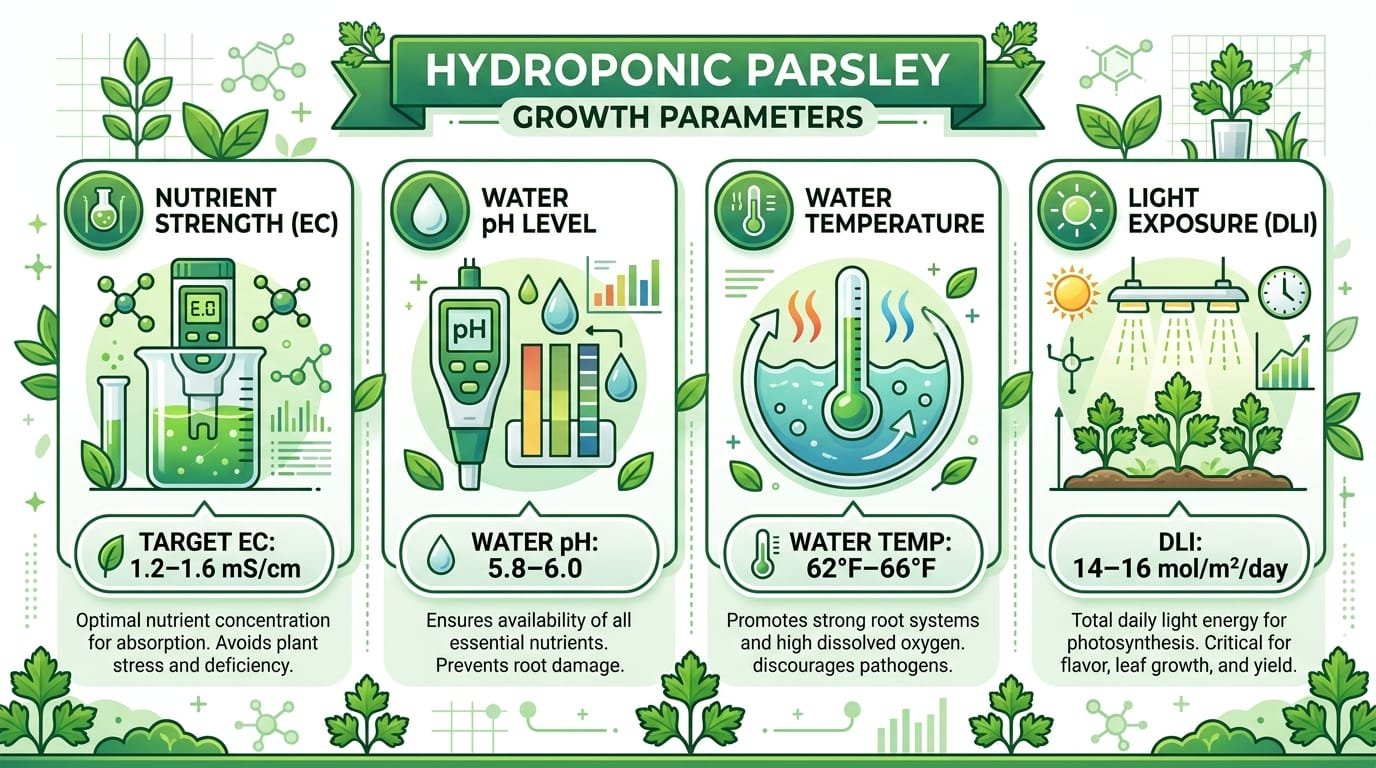
Grow hydroponic parsley in NFT channels, DWC buckets, or Kratky containers at EC 1.2–1.6 mS/cm and pH 5.8–6.0 with cool root water (62–66°F). Provide 200–250 µmol/m²/s PPFD on a 14–16 hour timer. Always harvest outer petioles 1 inch above the crown, leaving the central growing heart intact for continuous regrowth.
1.2–1.6 mS/cm
Seedlings: 0.6–0.8 mS/cm
5.8–6.0
Lockout begins >6.3
62°F–66°F
17°C–19°C (DO >6.5 mg/L)
10.1–14.4 mol/m²/d
200–250 µmol/m²/s (14–16h)
0.8–1.1 kPa
At 72°F & 62–65% RH
55–65 Days
Weekly continuous cuttings
📜 Table of Contents — Jump to Section

1. Equipment Shopping List & Real Startup Cost
To grow parsley hydroponically, you do not need industrial laboratory hardware. A complete starter setup requires only a light-tight reservoir, standard 2-part nutrients, and a basic digital meter kit. Calculate exact reservoir mixing ratios with our Hydroponic Nutrient Calculator. Below is an honest breakdown of essential equipment versus optional tuning tools:
| Item / Gear | Role & Specific Recommendation | Status | Est. Retail Cost |
|---|---|---|---|
| 5-Gallon Food-Grade Bucket or Tote | Black opaque reservoir (blocks algae) for DWC or Kratky setups | Essential | $8–$14 |
| 2-Inch Net Pots & Clay Pebbles | Anchors crown and vertical taproots while allowing oxygen flow | Essential | $10–$14 |
| Rockwool Starter Cubes (1-inch) | Inert, sterile propagation media holding exact moisture for germination | Essential | $12 (pack of 50) |
| Complete Hydroponic Base Nutrients | Standard 2-part liquid or dry formula (e.g. Masterblend 4-18-38 or General Hydroponics) | Essential | $18–$26 |
| Digital pH & EC/TDS Pens | Dual pocket meters to verify 1.2–1.6 mS/cm EC and 5.8–6.0 pH | Essential | $15–$22 |
| pH Down (Diluted Phosphoric Acid) | Adjusts alkaline tap water downward to prevent iron lockout | Essential | $12–$16 |
| Full-Spectrum LED Grow Bar (30–60W) | Provides 200–250 µmol/m²/s PPFD without excessive leaf heat | Recommended | $35–$65 |
| Fe-DTPA Chelated Iron Supplement | Only necessary if your base nutrients lack DTPA or tap water pH exceeds 7.2 | Optional | $14–$18 |
| Realistic Total Cost: $65–$95 for passive Kratky windowsill growing; $95–$145 for actively aerated DWC under dedicated LED lighting. | |||
2. Step-by-Step Growing Protocol (HowTo Steps 1–6)
Follow this chronological cultivation sequence to establish vigorous parsley crowns from dry seed to continuous weekly harvest:
Step 1: Pre-Soak Seeds & Sowing with Light Transition
Submerge parsley seeds in lukewarm (70°F / 21°C) dechlorinated water for 24 hours to leach out natural germination-inhibiting coumarins from the seed coat. Soak 1-inch rockwool cubes in pH 5.5 water, place 3 seeds per cube at 1/4-inch depth, and cover with a humidity dome at 68–72°F. Light transition instruction: While seeds swell in darkness during the first 10 to 14 days, you must introduce light upon first emergence (the moment the first green sprout appears) by turning on grow lights at 100 µmol/m²/s. Waiting longer in darkness causes seedlings to stretch into weak, pale strings that collapse.
Step 2: Thin Seedlings & Seat in Net Pots
When seedlings form their first set of serrated true leaves and white root tips emerge from the bottom of the rockwool block, thin to the single strongest seedling by snipping weaker stems at the base with micro-tip floral shears. Insert each rockwool cube into a 2-inch net pot, backfilling with pre-rinsed expanded clay pebbles (hydroton) to anchor the upright seedling and shield the moist rockwool from ambient light.
Step 3: Mix Reservoir & Calibrate pH (With Acid Safety Callout)
Fill your reservoir with clean, filtered water. Add complete vegetative hydroponic base nutrients to establish an initial EC of 1.2 mS/cm. Keep solution temperature between 62°F and 66°F (17°C–19°C) to maintain high dissolved oxygen. Next, adjust pH to 5.8–6.0. Use our Hydroponic pH Calculator to dose precisely.
Step 4: Regulate PPFD & Daily Light Integral (DLI)
Hang full-spectrum LED fixtures 12 to 16 inches above the parsley foliage, dialing output to deliver 200–250 µmol/m²/s PPFD. Because fixture outputs vary widely, verify intensity at canopy height using a quantum meter or free smartphone PAR app (such as Photone). Running lights on an automated 14 to 16-hour daily timer produces a Daily Light Integral (DLI) of 10.1 to 14.4 mol/m²/day ($DLI = PPFD imes ext{hours} imes 0.0036$). Calculate light needs using our DLI Calculator.
Step 5: Monitor Daily Drift & Perform 14-Day Solution Refresh
Inspect reservoir conductivity and pH every 2 days. As plants transpire water, EC naturally concentrates; top off with fresh dechlorinated water when EC rises more than 0.2 mS/cm above target. Every 14 days, perform a complete reservoir drain and refill with fresh nutrient solution to clear unused ballast ions and prevent mineral lockout. Learn maintenance routines in our guide to Cleaning Hydroponic Systems.
Step 6: Harvest Outer Stems Above the Basal Crown
When crowns reach 8 to 10 mature petioles (around day 55 to 65), begin harvesting. Using sanitized floral shears, snip the outermost petioles 1 inch above the crown junction. Never harvest more than 30% of total plant leaf volume in a single session, and never cut into the central rosette meristem.

3. Environmental & Nutrient Parameters by Stage
Parsley thrives across distinct growth stages. Use this reference matrix to adjust EC, acidity, and lighting as your seedlings transition into heavy vegetative production:
| Growth Stage | Target EC (mS/cm) | Solution pH | Water Temp (°F) | Target DLI (mol/m²/d) | Photoperiod (Hours) |
|---|---|---|---|---|---|
| Germination (Days 1–21) | 0.0 (Dechlorinated water) | 5.5–6.0 | 68–72 | Darkness until emergence, then 4.0 | 12h upon sprout |
| Seedling / Plug (Days 22–35) | 0.6–0.8 | 5.8–6.0 | 64–68 | 6.0–8.0 | 14h |
| Active Vegetative (Days 36–55) | 1.2–1.4 | 5.8–6.0 | 62–66 | 10.1–12.0 | 14–16h |
| Continuous Harvest (Days 56+) | 1.4–1.6 | 5.8–6.0 | 62–66 | 12.0–14.4 | 14–16h |
| Summary: Keep solution pH below 6.0 and water below 66°F to ensure nutrients stay bioavailable and prevent crown bolting. | |||||
4. Crown Harvest Biology: Why Outer Stems Only
The single most important principle in growing hydroponic parsley is understanding its basal crown architecture. Unlike basil (which branches from lateral axillary nodes when pinched) or mint (which roots along stolons), parsley emerges entirely from a compressed underground basal plate. Compare root and container spacing in our Vegetable Soil & Container Depth Guide.
New petiole spirals generate continuously from the central apical meristem (the “heart” of the rosette). As new leaves expand outward, older petioles are pushed to the exterior circumference. When gardeners make the common mistake of shearing the entire clump across the bottom like lawn grass, they sever the fragile apical meristem, either killing the plant or causing stunted, malformed regrowth.
By selectively snipping only the outermost mature stems 1 inch above the base, you leave the photosynthesizing center intact. A well-tended crown will produce steady weekly cuttings for 8 to 9 months before natural biennial senescence begins.
5. System Comparison: NFT vs. DWC vs. Kratky
Parsley grows well across all primary hydroponic configurations. Choose your system based on available space and complexity:
- Nutrient Film Technique (NFT): Ideal for high-density horizontal benches. Channels must provide at least 2.5 inches of vertical clearance to prevent parsley’s taproot from blocking solution flow. Learn how to construct channels in our DIY Hydroponic NFT System Guide.
- Deep Water Culture (DWC): The most forgiving method for home growers. The large volume of water acts as a thermal buffer, keeping root temperatures cool and stable. Compare herb behaviors in our guide to Growing Hydroponic Basil.
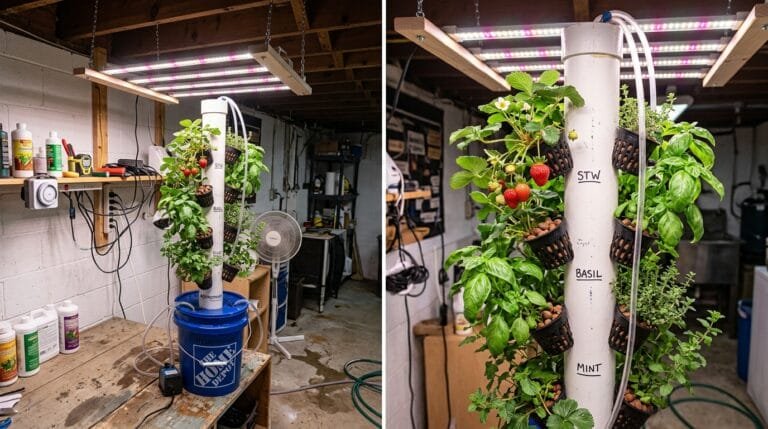
- Passive Kratky Method: Zero-electricity cultivation in 3- to 5-gallon buckets. Perfect for sunny windowsills or simple grow tents. Follow our complete tutorial on the Kratky Method.

6. 3-Step Rapid Diagnostic & Troubleshooting Matrix
Whenever your parsley exhibits pale foliage, slow growth, or drooping stems, run through this 3-Step Rapid Diagnostic Check before adding chemicals:
- Check Solution pH: Dip your calibrated pH pen. If reading is >6.2, your plant is locked out of iron regardless of nutrient concentration. Lower to 5.8 with diluted pH Down.
- Check Water Temperature: If reservoir water exceeds 70°F (21°C), dissolved oxygen drops sharply, inviting root rot. Relocate the reservoir or insulate against hot floors.
- Inspect the Root Zone: Healthy roots are crisp, fibrous, and pearly white. Brown, slimy roots indicate Pythium rot, requiring an immediate system flush. Verify conductivity targets with our EC to TDS Converter.
| Observed Symptom | Primary Root Cause | Immediate Remedy | Long-Term Prevention |
|---|---|---|---|
| Interveinal chlorosis on new upper leaves | Iron lockout caused by solution pH drifting above 6.3 | Lower pH to 5.8 with pH Down; add 2.0 ppm Fe-DTPA if needed | Check nutrient label for stable chelates; test pH every 48 hours |
| Lower mature leaves turning pale yellow | Nitrogen depletion or low overall EC in reservoir | Dose vegetative base nutrients to bring EC to 1.4 mS/cm | Conduct biweekly complete solution flushes and refills |
| Marginal leaf tip burn on expanding fronds | Calcium transport failure due to stagnant air / low VPD (<0.6 kPa) | Increase canopy air circulation with oscillating fans | Maintain grow room relative humidity between 60% and 68% |
| Sudden daytime wilting with mushy brown roots | Pythium root rot triggered by water temperatures >72°F | Flush system, prune blackened root tips, chill water to 64°F | Keep reservoir chilled at 62°F–66°F with continuous DO >6.5 mg/L |
| Stems growing thin, pale, and leggy | Insufficient light intensity (DLI <8.0 mol/m²/day) | Lower LED fixture to 12–14 inches; extend photoperiod to 16h | Verify canopy PPFD reaches 200–250 µmol/m²/s with a quantum sensor |
| Stunted growth with purplish leaf undersides | Phosphorus lockout caused by root zone cold stress (<58°F) | Warm reservoir water up to 64°F using an aquarium heater | Insulate nutrient reservoirs against cold concrete floors |
| Green algae coating rockwool cubes and net pots | Light penetration into damp nutrient solution at net pot collar | Top net pots with hydroton pebbles or opaque neoprene collars | Ensure all channel lids and net pot openings are 100% light-tight |
| Premature flower stalk elongation (bolting) | Thermal stress (>78°F air / >72°F root) or photoperiods >16 hours | Harvest remaining tender foliage immediately before bittering | Grow slow-bolting cultivars like Krausa and keep water cool |
| Curled young leaflets with sticky honeydew residue | Aphid colonies (Myzus persicae) feeding on phloem sap | Isolate pots, wash with insecticidal soap, rinse before returning | Hang yellow sticky cards above canopies for early pest detection |
| Diagnostic Rule: Most parsley leaf issues stem from pH drift (>6.3) blocking iron or excessive water heat (>72°F) depriving root cells of dissolved oxygen. | |||
🔬 Advanced Tuning: VPD Calculations & Chelate Dynamics (For Precision Growers)
For growers operating commercial benches or closed grow tents, fine-tuning atmospheric vapor pressure deficit (VPD) and chelation chemistry unlocks faster petiole growth:
1. Atmospheric VPD & Transpiration (Tetens Equation)
Vapor pressure deficit controls stomatal transpiration, pulling calcium ions from roots to rapidly expanding leaf margins. At 72°F (22.2°C) ambient temperature, saturation vapor pressure is approximately 2.68 kPa. At 62–65% relative humidity, air VPD sits right at 0.95–1.0 kPa, which is the optimum window for Apiaceae crops. If relative humidity drops to 55% at 72°F, VPD rises to 1.2 kPa, requiring gentle canopy airflow to prevent stomatal closure. Calculate exact grow room targets with our VPD Calculator.
2. Chelate Stability Curves
Standard synthetic chelate Fe-EDTA destabilizes rapidly when solution pH exceeds 6.2, precipitating insoluble ferric hydroxide ($Fe(OH)_3$). Fe-DTPA maintains strong molecular coordination with iron ions up to pH 7.5, ensuring continuous root absorption even during upward alkaline shifts.
3. Dissolved Oxygen Saturation
Water temperature dictates dissolved oxygen capacity: at 64°F (17.8°C), fresh water holds approximately 9.5 mg/L DO at saturation, compared to only 8.0 mg/L at 75°F. Keeping the root zone chilled at 62–66°F ensures active respiration across root membranes.
Pin This Hydroponic Parsley Guide
Save this step-by-step indoor parsley grow card to your Pinterest boards for easy reference during reservoir calibrations:

Frequently Asked Questions
Horticultural Extension & Agronomic Field Resources
The nutritional parameters, chelate dynamics, and physiological thresholds in this guide are grounded in established university extension bulletins and controlled-environment research:
- Cornell University Controlled Environment Agriculture: Hydroponic Herb Production & Environmental Targets
- University of California Davis Postharvest Technology Center: Parsley: Recommendations for Maintaining Postharvest Quality & Storage Conditions
- University of Massachusetts Amherst Extension: Greenhouse & Hydroponic Herb Nutrient Management
- Texas A&M AgriLife Extension: Commercial Vegetable & Herb Production Crop Profiles
Written by Wara Danish, MSc
Lead Horticultural Researcher • CurrentGardening
Wara holds an MSc in Horticultural Sciences and specializes in urban agriculture, soilless media dynamics, and controlled environment hydroponics. Reviewed and verified for biological precision under the CurrentGardening Editorial Policy.