What Is Aeroponics? A Beginner’s Introduction to Mist-Root Growing
Setup Time: 2–4 Hours
Estimated Cost: $80–$250 for pump, nozzles & cycle timer
What Most Guides Miss (And What You Will Learn Here)
- Why standard 50-micron high-pressure spray nozzles clog within 7 days — and why hobby growers should use 100-micron nozzles paired with a 120-mesh inline filter.
- Why ultrasonic “foggers” (<5 microns) fail to transport heavy Calcium ions to roots, causing leaf tipburn even when reservoir calcium levels are high.
- How a 45-minute power outage causes irreversible root desiccation — and the hybrid 2-inch bottom water buffer that saves your crop.
- Why submersible water pumps heat up mist chambers above 68°F (20°C), triggering rapid Pythium root rot slime.
- The exact difference between Low-Pressure Aeroponics (LPA) and High-Pressure Aeroponics (HPA) cycle timing.

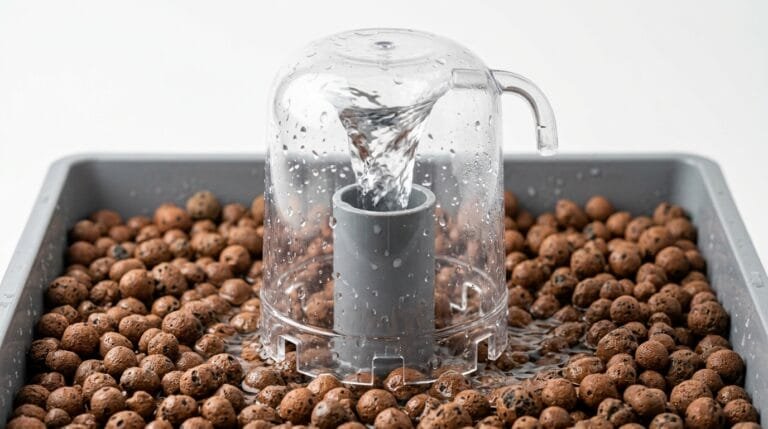
1. How Aeroponic Misting Physics Actually Work
Aeroponic physics rely on droplet atomization. When nutrient solution is pressurized through micro-nozzles into droplets between 30 and 80 microns, root hairs absorb mineral ions almost instantly while remaining exposed to atmospheric oxygen (21% oxygen compared to 8 mg/L in water).
Because roots do not expend metabolic energy pushing through soil or fighting submerged hypoxia, vegetative growth accelerates dramatically. However, droplet size is critical: droplets larger than 100 microns drench roots and block oxygenation, while droplets under 30 microns drift away without depositing mineral nutrients.
| Droplet Diameter Range | Generation Method | Root Hair Penetration | Oxygen Exposure | Horticultural Verdict |
|---|---|---|---|---|
| < 5 Microns (Fog) | Ultrasonic Piezo Disc | Poor (Drifts in air) | Very High | Causes calcium deficiency & salt crusting |
| 10 – 25 Microns | High-Pressure (100+ PSI) | Moderate | High | Good for propagation and root cuttings |
| 30 – 50 Microns (Ideal) | HPA Accumulator Tank | Optimal (Rapid uptake) | Optimal | Peak balance of water, ions, and oxygen |
| 50 – 80 Microns | Diaphragm Pump (80 PSI) | Excellent | High | Reliable target for commercial aeroponics |
| 80 – 150 Microns | Low-Pressure Spray (LPA) | Good | Moderate | Standard hobby tower sprayers |
| 150 – 300 Microns | Submersible Fountain Pump | Fair (Heavy droplets) | Lower | Acts more like NFT drip than aeroponics |
| > 300 Microns (Stream) | Direct Drip Emitter | Root run-off | Low | Ineffective for bare-root mist chambers |

2. Aeroponics vs. Deep Water Culture (DWC) vs. NFT
Expanding beyond the fundamentals, hydroponic system selection requires a deep technical understanding of root zone dynamics and specific environmental controls. True aeroponics, encompassing both High-Pressure Aeroponics (HPA) and Low-Pressure Aeroponics (LPA), delivers unparalleled oxygen to the root zone by suspending roots completely in air, then intermittently misting them with a nutrient solution. This contrasts sharply with Deep Water Culture (DWC), where roots are continually submerged in an aerated reservoir, and Nutrient Film Technique (NFT), which relies on a shallow, flowing film. The direct exposure of aeroponic roots to atmospheric air provides roughly 21% oxygen concentration, a significant increase over the typical 8-10 mg/L dissolved oxygen (DO) achievable in well-aerated DWC systems. This higher oxygenation promotes accelerated nutrient uptake and robust root development, directly impacting growth rates and yield potential. Unlike NFT channels, which can experience root mat blockages that restrict nutrient flow and air access, aeroponics permits full, unhindered root expansion and allows for meticulous individual root inspection without disturbing the plant.
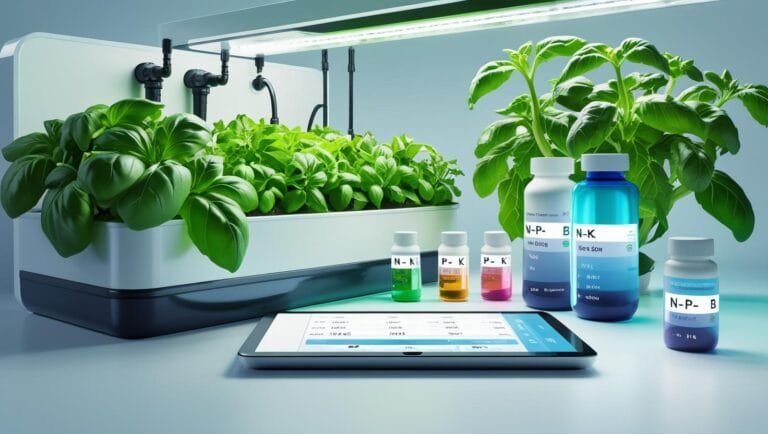
Aeroponics: Precision Nutrient Delivery
True aeroponics demands precise control over nutrient delivery and environmental parameters. HPA systems employ diaphragm pumps operating at 60-90 PSI to atomize nutrient solution into micro-droplets, typically between 5-50 microns in diameter. This fine mist maximizes the root surface area available for direct nutrient absorption and gas exchange. A common nutrient delivery cycle involves pulsing the mist for 5-7 seconds every 3-5 minutes, allowing roots to absorb solution then respire atmospheric oxygen. For vegetative growth of leafy greens, maintain an EC between 1.2-1.8 mS/cm and a pH of 5.5-6.0. Fruiting plants like tomatoes require higher ECs, typically 1.8-2.5 mS/cm, with a pH of 5.8-6.5 during flowering and fruiting stages. System maintenance requires diligent inspection of spray nozzles for clogging, alongside periodic sanitization (e.g., using dilute hydrogen peroxide solutions) to prevent root pathogen proliferation. Power outages present a significant operational risk, with roots desiccating within 30-45 minutes without misting, necessitating backup power solutions or immediate manual intervention.
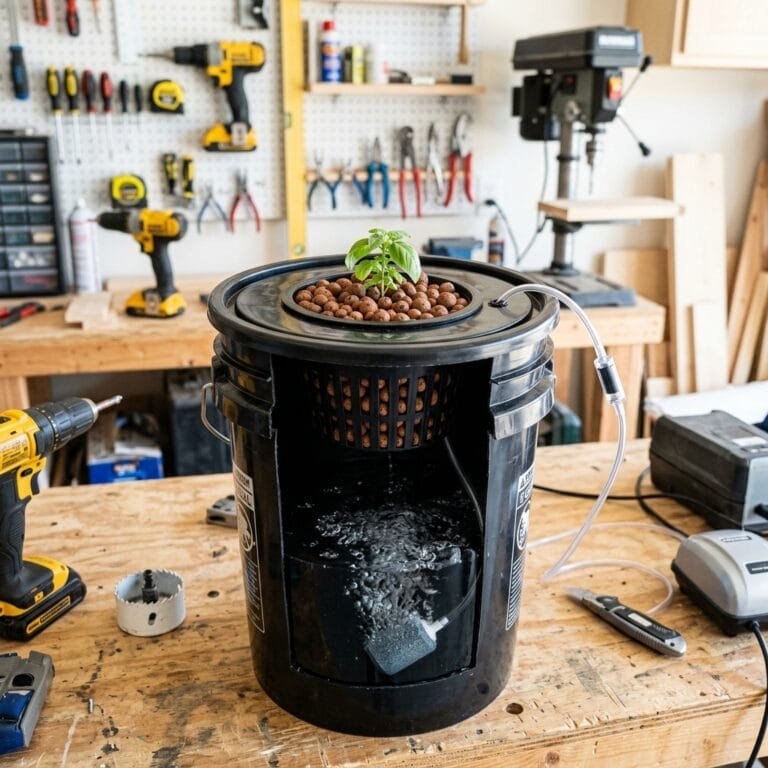
Deep Water Culture (DWC): Stability and Simplicity
Deep Water Culture (DWC) systems offer a simpler approach where plant roots are continuously submerged in a well-aerated nutrient-rich solution. Oxygen supply relies on robust air pumps and air stones to maintain dissolved oxygen (DO) levels, ideally between 6-8 mg/L for vigorous root development and to mitigate anaerobic conditions. Solution temperature management holds paramount significance; maintaining 18-22°C (65-72°F) mitigates the risk of anaerobic pathogens like Pythium, which proliferates at higher temperatures and lower DO concentrations. DWC systems benefit from a larger solution volume, offering greater stability for pH and EC fluctuations compared to the rapid changes observed in aeroponic systems. A target pH of 5.8-6.5 and EC matching crop requirements, typically 1.0-2.0 mS/cm, work effectively. Regular reservoir changes, typically weekly, are advisable to replenish depleted micronutrients and prevent nutrient imbalance or accumulation of root exudates. DWC exhibits a high buffer against power interruptions, with roots able to survive submerged for 24 hours or longer without aeration, making it resilient for beginner growers.
Nutrient Film Technique (NFT): Efficient Flow Systems
Nutrient Film Technique (NFT) channels provide a continuous, shallow film of nutrient solution flowing over the root tips. This design ensures roots have constant access to hydration and nutrients while also exposing a significant portion of the root mass to the air above the film, facilitating oxygen exchange. Proper channel slope, typically 1:30 to 1:40 (a drop of 1 unit for every 30-40 units of length), and a consistent flow rate, such as 0.5-1.0 L/min per channel, are critical parameters for optimal nutrient film formation without waterlogging. EC targets range from 1.0-2.0 mS/cm and pH 5.8-6.5 for most common crops like lettuce and basil. A primary operational consideration involves managing root mat development within the channels, which can impede nutrient flow and oxygen availability if left unaddressed. Periodic root trimming or system sanitization (e.g., with hypochlorous acid) may be necessary. Similar to aeroponics, NFT systems possess limited resilience to power outages; roots may experience wilting within 1-2 hours without nutrient circulation, requiring backup power or manual irrigation to prevent crop loss.
3. Low-Pressure (LPA) vs. High-Pressure (HPA) Systems
Low-Pressure Aeroponics (LPA) operates at 15 to 30 PSI using standard aquarium pumps and 360-degree spray heads, making it ideal for home towers. High-Pressure Aeroponics (HPA) operates at 80 to 100 PSI using diaphragm pumps and accumulator tanks to produce 50-micron atomized mist.
A. Low-Pressure Aeroponics (LPA) for Hobbyists
LPA systems use affordable high-flow submersible pumps to spray nutrient solution over root masses. While droplet sizes average 100 to 200 microns, LPA is highly reliable against clogging and requires minimal filtration maintenance.
B. High-Pressure Aeroponics (HPA) for Maximum Yields
HPA systems use specialized booster pumps operating above 80 PSI. The resulting micro-mist stimulates fine root hair formation that absorbs nutrients instantly. Commercial growers prefer HPA for seed potato production and fast-turn leafy greens.
C. Why Ultrasonic Fogponics Fails for Heavy Crops
Ultrasonic foggers create droplets under 5 microns. While visually dramatic, these tiny particles cannot transport heavier mineral molecules like Calcium ($Ca^{2+}$) and Phosphorus across the root zone, leading to nutrient lockouts.

Insights Most Growers Overlook
- Aeroponic root chambers must be 100% light-tight; even subtle light penetration triggers green algae growth on roots.
- Adding 2 inches of nutrient solution at the base of your aeroponic chamber creates a life-saving backup buffer during power outages.
- Silicone-tipped misting nozzles resist salt crusting 3 times longer than brass or stainless steel nozzles.
- Lowering EC by 20% compared to DWC targets prevents leaf tip burn because aeroponic absorption rates are faster.
Common Mistakes to Avoid
- Never run continuous 24/7 misting; roots need dry rest periods (such as 3 minutes OFF / 1 minute ON) to breathe.
- Never install misting sprayers without a 120-mesh inline water filter upstream of your pump.
- Never allow submersible pump heat to warm your reservoir water above 68°F (20°C).
- Never use organic emulsions like fish hydrolysate or seaweed pulp in aeroponic spray lines.
- Never ignore a sputtering nozzle; clean clogged spray tips immediately in a 10% citric acid bath.
4. How Do You Set Up an Aeroponic Misting Cycle Timer?
4. Configuring the Aeroponic Misting Cycle Timer for Optimal Root Zone Development
Precision in misting cycles forms the bedrock of successful aeroponic cultivation, directly influencing root oxygenation, nutrient uptake kinetics, and pathogen resistance. The objective is to consistently deliver a nutrient-rich mist to the root zone without inducing saturation leading to anoxia, nor desiccation, thereby promoting vigorous, adventitious root development.
The primary control component is a programmable repeat-cycle timer, positioned electrically between the high-pressure pump (HPA) or submersible pump (LPA) and its dedicated power outlet. These timers permit independent calibration of ON and OFF intervals, typically in seconds or minutes, offering granular control over the root environment.
High-Pressure Aeroponics (HPA) Cycle Configuration
- **ON Duration:** For true HPA systems generating micro-droplets (5-50 microns) via specialized nozzles operating at 60-80 PSI, set the ON duration to a brief 2 to 7 seconds. This brief burst provides adequate nutrient film deposition without forming standing water on root surfaces, which displaces atmospheric oxygen.
- **OFF Duration:** Configure the OFF duration to 3 to 5 minutes. This interval facilitates adequate gaseous exchange within the root zone, allowing roots to respire and absorb atmospheric oxygen. Observation of root tips for signs of desiccation is advised, particularly in low-humidity environments or during periods of elevated transpiration rates.
Low-Pressure Aeroponics (LPA) and Aeroponic Tower Cycle Configuration
- **ON Duration:** LPA systems, often employing less pressure and larger orifice nozzles, require a longer ON duration due to larger droplet sizes and reduced atomization. Set this between 1 to 5 minutes to ensure thorough wetting of the entire root mass.
- **OFF Duration:** The OFF cycle for LPA systems should typically range from 5 to 15 minutes. The increased volume of nutrient solution delivered per cycle means roots remain hydrated for a longer period, thus permitting extended oxygenation periods between mistings.
Environmental and Plant Stage Adjustments for Misting Cycles
Cycle timings are not static and demand dynamic adjustment based on ambient environmental conditions and specific plant physiological demands:
- **Temperature & Humidity:** In grow environments where air temperatures exceed 28°C or relative humidity drops below 40%, consider reducing the OFF cycle duration by 30-60 seconds to mitigate the risk of root desiccation and heat stress. Conversely, cooler, more humid conditions (e.g., below 20°C, above 70% RH) may allow for slightly extended OFF periods without adverse effects.
- **Plant Maturation Phase:**
- **Propagation (Clones/Seedlings):** Young plants with developing, nascent root systems benefit from more frequent misting to prevent drying. An ON:OFF ratio of 3-5 seconds ON / 2-3 minutes OFF is frequently optimal for promoting rapid root initiation.
- **Vegetative Growth:** Maintain standard HPA or LPA timings as outlined above. During this phase, ensure the nutrient solution’s Electrical Conductivity (EC) remains within 1.2-1.8 mS/cm and pH is consistently maintained at 5.8-6.2.
- **Flowering/Fruiting:** Plants exhibit heightened nutrient and water uptake demands. While maintaining adequate oxygenation, slightly increase the ON duration by 1-2 seconds or decrease the OFF duration by 30 seconds to support increased metabolic rates and fruit development. Target an EC of 1.8-2.4 mS/cm, adjusting based on cultivar specific requirements.
Routine physical inspection of the root zone remains the definitive indicator of correct cycle timing. Healthy roots appear brilliantly white, numerous, and highly fibrous, exhibiting no signs of browning, sliminess (indicative of root rot), or desiccation. Adjust misting intervals incrementally, observing root response over 24-48 hours to precisely fine-tune system performance and optimize plant health.
5. Troubleshooting Clogged Nozzles and Root Rot
5. Hydroponic System Diagnostics and Remediation
Effective management of hydroponic systems necessitates rigorous attention to component integrity and plant health. Addressing system malfunctions promptly prevents cascading failures and maintains optimal crop performance.
Clogged Nutrient Delivery Nozzles
Malfunctioning spray nozzles, evidenced by reduced pressure, irregular spray patterns, or complete blockage, directly compromise nutrient delivery uniformity, leading to localized nutrient deficiencies and plant stress. The primary culprits are mineral precipitation (e.g., calcium carbonate, magnesium phosphate scale) and biofilm accumulation. Prophylactic measures include maintaining solution pH within the optimal range of 5.5-6.5 to minimize mineral dropout, using reverse osmosis (RO) water to reduce incoming mineral loads, and implementing fine-mesh filtration (e.g., 150-micron screens) upstream of the pump to capture particulate matter.
- Disassembly & Cleaning: Carefully disconnect and remove affected nozzles, noting their original orientation for proper reassembly.
- Soaking: Submerge nozzles for a minimum of 60 minutes in a warm, 5% acetic acid (distilled white vinegar) solution. For persistent inorganic scale, a 10-15% solution of food-grade citric acid or a specialized descaler formulated for hydroponic systems can accelerate dissolution. Ensure solution temperature is between 40-50°C (104-122°F) for enhanced efficacy.
- Mechanical Assistance: Utilize a soft-bristle brush or a fine-gauge wire (e.g., 0.2-0.5 mm diameter, such as a welding tip cleaner) to dislodge softened deposits from the orifice, exercising extreme caution not to deform the nozzle’s spray pattern geometry. Ultrasonic cleaners are highly effective for comprehensive descaling without mechanical abrasion.
- Rinsing & Testing: Thoroughly rinse all components with demineralized water (e.g., RO water) before reassembly. Test nozzle functionality with plain water prior to reintroducing nutrient solution to verify proper atomization and flow.
Remediating Root Rot Pathologies
Root rot, primarily caused by opportunistic oomycetes such as Pythium spp. or Phytophthora spp., manifests as browning, sliminess, and a putrid odor in the root mass. This pathology severely impairs water and nutrient uptake, leading to plant wilting, stunted growth, and eventual senescence. The underlying causes are typically environmental: elevated reservoir temperatures, insufficient dissolved oxygen (DO), or unhygienic system conditions.
- Environmental Optimization: Maintain nutrient solution temperature within 18-22°C (64-72°F) using reservoir chillers if ambient temperatures exceed this range. Ensure high dissolved oxygen levels, ideally > 6 ppm, through vigorous aeration with appropriately sized air pumps (e.g., 1.0-1.5 LPM per 10 liters of solution volume) and porous air stones. Regular monitoring of DO levels with a dissolved oxygen meter is advised.
- System Sterilization: For active infections, immediately isolate affected plants. Completely drain the entire system. Sterilize all components—reservoir, plumbing lines, pumps, and drippers—with a 3% hydrogen peroxide (H2O2) solution at a concentration of 100 mL per 10 liters of water, circulating for 24-48 hours. Alternatively, a dilute sodium hypochlorite solution (20-50 ppm free chlorine) can be circulated for 30 minutes, followed by thorough rinsing and neutralization with sodium thiosulfate.
- Root Pruning & Reintroduction: Carefully prune all necrotic, discolored root mass with sterile shears, removing any softened or visibly diseased tissue. Rinse remaining healthy roots under clean, demineralized water.
- Beneficial Microbial Inoculation: After refilling with fresh, pH-balanced nutrient solution (target pH 5.8-6.2), introduce beneficial microbial inoculants (e.g., Bacillus subtilis, Trichoderma harzianum) to establish a protective biological barrier against pathogens. Monitor EC and pH diligently following treatment and adjust nutrient concentrations if plants show signs of stress.
Key Takeaways
- Aeroponics suspends plant roots in dark air chambers sprayed with 30–80 micron nutrient mist.
- Delivers maximum root oxygenation, resulting in up to 30% faster vegetative growth.
- Requires inline 120-mesh filtration and clean dry-salt nutrients to prevent nozzle clogs.
- Always maintain a 2-inch emergency liquid reservoir at the base of your chamber against power cuts.
Save this guide for later!
Pin this aeroponics beginner cheat sheet to your favorite Pinterest board so you never lose these misting rules.

6. Frequently Asked Questions
Why do my aeroponic misting nozzles keep clogging within a week?
Nozzle clogging is caused by calcium nitrate and phosphate salt crystallization on tiny 50-micron apertures. To fix this, switch to 100-micron nozzles, install an upstream 120-mesh inline filter, and flush lines monthly with 5% citric acid.
How long can aeroponic roots survive during a power outage?
Without mist, bare root hairs dry out and suffer irreversible cell death within 45 to 60 minutes. Always keep 2 inches of nutrient solution at the bottom of your chamber as an emergency reserve bath.
Can I use standard organic fertilizers or compost teas in aeroponics?
No. Organic emulsions contain suspended particulates and biofilm-forming microbes that clog aeroponic sprayers within 24 hours. Always use clean, 100% water-soluble dry salts.
What is the ideal misting cycle timer schedule for lettuce and herbs?
For high-pressure systems, run 5 seconds ON / 3 minutes OFF. For low-pressure hobby towers, run 1 minute ON / 4 minutes OFF. Check our full Aeroponic Tower Misting Schedule Guide.
Why are my aeroponic roots turning brown and slimy?
Brown slime indicates Pythium root rot caused by reservoir water temperatures exceeding 68°F (20°C). Keep water cool (62°F–65°F) using an external inline pump or water chiller.
Is aeroponics better than Deep Water Culture (DWC) for beginners?
DWC is more forgiving for absolute beginners because roots sit in a permanent water bath. Aeroponics provides 30% faster growth but requires stricter maintenance against nozzle clogs and power outages.
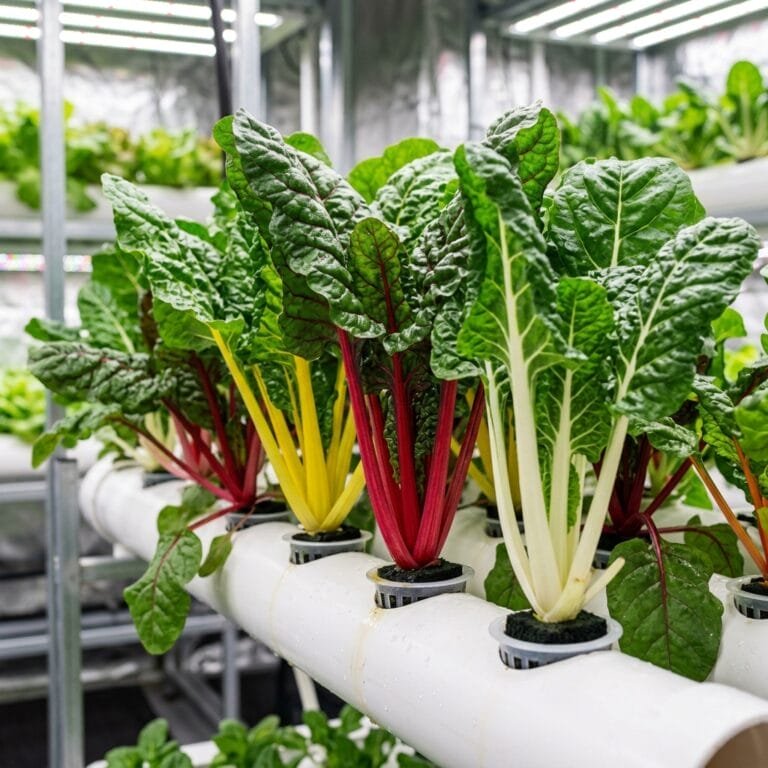
What crops grow best in an aeroponic tower or mist box?
Leafy greens (lettuce, kale), culinary herbs (basil, mint), strawberries, and seed potatoes thrive exceptionally well. See our complete list of Best Crops for Aeroponics.
🌿 Complete Aeroponic Growing Series
Explore our comprehensive aeroponic engineering library:
- Best Crops for Aeroponics — Top vegetables, herbs, and root crops
- Aeroponic Tower Misting Schedule Guide — Ideal ON/OFF timer cycles
- How to Prevent Algae in Hydroponic & Aeroponic Chambers
- EC to PPM Conversion Calculator — Dial in your misting solution strength